
Let's start with some context and a plug for the new Azure Static Web Applications offering.
Azure Static Web Applications are still in preview as of the writing of this article, and so far I really like this Azure offering. I have 4 sites running on them, 3 are Hugo static sites and one is just a plain HTML page.
My sites have cost me nothing except for the domain name registration (at about $10 yearly) and they run very fast and scale nicely. Check out the below screen shot of the web page test results for my agile blog.

Ok, so yes that Cache static content rating sticks out like a sore thumb, but look at that Security score and all those A's! Some credit goes to Cloudflare for doing some of the lifting on the image compression and CDN.
In this post I wanted to walk through how to add Azure function API to an existing Azure Static Web Application as it is not quite the same as native Azure function applications.
I have a post on Azure Static Web Applications that explains how I have setup my sites, so take a look at that if you want more info.
For a while I have run these sites, but they just serve content pages and have no interactive pages, like a contact page. Static Web Applications don't run on an IIS server, so any server functionality has to be implemented with an API.
Azure Static Web Apps provide access to a simplified Azure function app. To add an api to your static web app you'll need the Azure Functions Core Tools.
Note: I had some issues with version 3 of the Core Tools, my GitHub build action kept failing on a max zip file size exceeded error.
Reason: The size of the function content was too large. The limit for this static site is 30000000 bytes.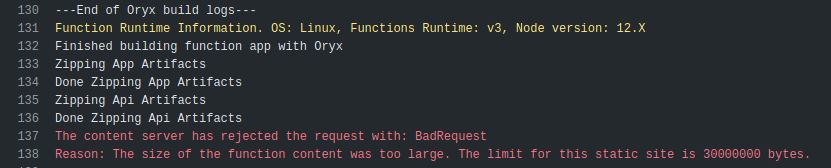
So I downgraded to version 2. Here is the command to install the Azure Functions Core Tools on Ubuntu.
sudo apt-get update
sudo apt-get install azure-functions-core-tools-2
Once the core tools are installed you will be able to use the "func" command. To create a website api, from my site root directory I ran the command to create a function app.
func init apiThis command will create a folder called "api" in your site. It will create a .gitignore file but it will not create a git repository unless you add the "--source-control true" parameter. You can always make it a git repository after the fact. Since my site is already setup as a Git repo and remoted to GitHub this wasn't necessary.
Initializing a functions app will run a command line "wizard" that prompts you for the runtime engine. In my case I added a function called "Contact" and set the runtime to Node. The wizard will create the config files for your function app.
Once you have your functions app created you can add functions to it. I didn't install any of the Azure Functions Core Tools Extensions, but this is something you can do if you want to take advantage of the triggers and bindings beyond the HTTP trigger. For Azure Static Web Apps only HTTP trigger functions are supported. These are the constraints on Azure Functions served within Static Web Apps:
For more information read the docs on Static Web App APIs.
Since I was adding an end point for my contact form my function name was "Contact". To add a function to your Function App, change to the function app directory, the "api" directory in this case.
func newThe "func new" command will initiate the new function wizard. It will prompt you with a list of Azure Function triggers. For my contact endpoint I picked the "HTTP Trigger".
The core tools creates your function with boilerplate code. By default an anonymous function is created and it accepts GET and POST requests. It is possible to enforce the presence of a token or even a login to secure an api, for this post I am using anonymous access.
You can run your function app locally with this command.
func start --buildThe Theme I am using has a contact form that posts with the default form encoding (application/x-www-form-urlencoded). But my Azure function seems to be expecting json.
The boilerplate NodeJS source code looks like this -
module.exports = async function (context, req) {
  context.log('Javascript HTTP trigger function processed a request.');

  const name = (req.query.name || (req.body && req.body.name));
  const responseMessage = name
    ? "Hello, " + name + ". This HTTP triggered function executed successfully."
    : "This HTTP triggered function executed successfull. Pass a name in the query string or in the request body for a personalized response.";
    context.res = {
      // status: 200, /* Defaults to 200 */
      body: responseMessage
    };
}
To test the form locally I had to do a bit of inelegant setup. The "Hugo server" command runs a Hugo site on port 1313, and running the Azure Core tools "func start" command runs your Azure functions app on port 7071. So I setup my form action="http://localhost:7071/api/contact". Filling out and post the form causes the response where the name field is empty. Coincidentally my form has a name field, but it was not picked up by the function. I try a post using JSON data with this curl command:
curl -d '{"name":"test"}' -X POST http://localhost:7071/api/contactThis works, the name is displayed. So I need to change the code to parse regular old form key value pairs. There are a few options, but I choose the 'qs' package for Node, it seems simple enough.
Install the 'qs' package into the Azure functions app, at the "api" level run the npm install command for qs.
npm install qs -S -EAdd a require statement ahead of the function definition to include this library. Here is the code so far -
const qs = require('qs');

module.exports = async function (context, req) {
  context.log( 'JavaScript HTTP trigger function processed a request.');
  var name = "";
  var email = "";
  var subject = "";
  var message = "";

  if( req.rawBody ) {
    var formData = qs.parse(req.rawBody);

    name = formData.name;
    email = formData._replyto;
    subject = formData._subject;
    message = formData.message;
  }

  context.log(name);
  context.log(email);
  context.log(subject);
  context.log(message);

  context.res = {
    status: 302,
    headers: {
      'Location' : '/thankyou'
    },
    body: 'Redirecting...'
  }
  context.done(null, context.res);
}
As you can see, this qs query string parsing library is super simple to use. It just expects query string format. I point it at the body content and my form data is parsed.
Now that I can parse the data from the contact form, I want to email it to myself so I can respond. It might also be a good idea to store contact requests in a Azure Storage table just in case the email doesn't get through for some reason. For this walkthrough I will focus on sending an email using sendgrid.
The instructions to setup a SendGrid account and get an API key are well described on the SendGrid NodeJS Quickstart page. So I won't go into those details. Once you have your SendGrid API key your going to want to put it in your function app config. This is done via the Azure Portal and your function app needs to exist there before that can be done.
In GitHub, I had to add the api folder to the build action config YAML file, save that update, then push my new api function app and contact function to trigger the build and deploy.
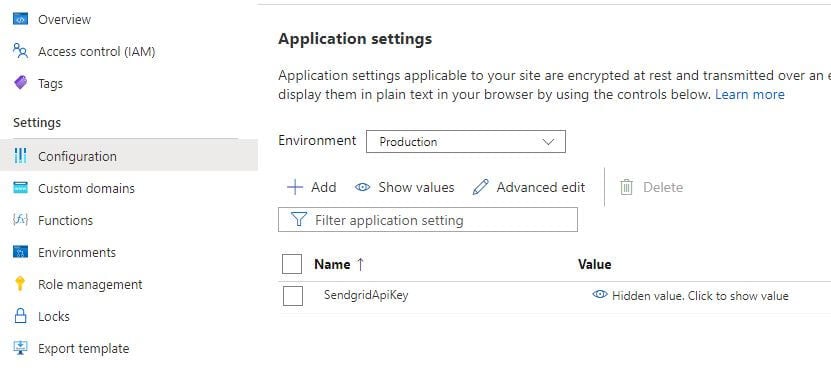
api_location: "/api" # Api source code path - optionalOnce your Azure function is deployed you can select the "configuration" item in the Azure Static Web Application hosting your site and add an environment variable for your SendGrid API key.
For local testing you can add the same variable to the local.settings.json file in the Azure function app (api folder). To access the SendGrid key from your function use the process.env["keyname"] function. I added variables for the send email and receiver email addresses as well. Here is the full code listing with SendGrid added.
const qs = require('qs');
const sgMail = require('@sendgrid/mail');

module.exports = async function (context, req) {
  context.log( 'JavaScript HTTP trigger function processed a request.');
  var name = "";
  var email = "";
  var subject = "";
  var message = "";

  if( req.rawBody ) {
    var formData = qs.parse(req.rawBody);

    name = formData.name;
    email = formData._replyto;
    subject = formData._subject;
    message = formData.message;
  }

  context.log(name);
  context.log(email);
  context.log(subject);
  context.log(message);

  sgMail.setApiKey(process.env["SendgridApiKey"]);

  const msg = {
    to: process.env["Recipient"],
    from: process.env["Sender"],
    subject: subject,
    text: message,
  }
  sgMail.send(msg);

  context.res = {
    status: 302,
    headers: {
      'Location' : '/thankyou'
    },
    body: 'Redirecting...'
  }
  context.done(null, context.res);
}
So, a super simple implementation of a contact form api end point added to an Azure Static Web application site.
Creating an api to support back-end functionality that would normally be handled by a web server is fairly straightforward with the Azure function support in the new Azure Static Web Application offering.
The implementation in this post is very simplistic. You will likely want to add validations to your function, a recaptcha challenge, etc. But it shows how to enable interactive functionality for your static site.
If you are interested in setting up your own Azure Static Web App, check out my first looks at Azure Static Web applications. Some posts on Hugo include Using Hugo Themes and Hugo Robots and Sitemaps.
Photo by Yung Chang on Unsplash