
It is possible to manually add 301 redirects in the Umbraco CMS to preserve backlinks (links from other sites to your site) and search indexed page links (from Google Search), as well as any site links that have been circulated on marketing materials. On an Umbraco site, 301 redirects are automatically created when a page is moved or renamed, and entries can also be manually added to the umbracoRedirectUrl table with a bit of SQL or custom code. The umbracoRedirectUrl table stores all the Umbraco 301 redirects for a site. You may be required to manually add 301 redirects if your site has been rebuilt from another CMS technology and migrated to Umbraco and is keeping the same domain name. If you have a large number of redirects to add, URL rewrites are a better alternative.
Minimizing your use of Plugins and Packages is a good practice as packages can make upgrades difficult and sometimes cause incompatibility issues. In this post I look at 2 approaches on how to 301 redirect Umbraco without plugins or packages and weigh the benefits of each approach.
If you create a page in the Umbraco Backoffice content tree and publish it, then rename it and publish again, a redirect is created. Umbraco assumes that once your page is published and is thus public, that page link has possibly been bookmarked by a user, linked to by another site, or indexed by internet search engines. That page link is in use on the web, it is in the public domain. If someone clicks your page link in a Google search and you've renamed it, your site has a broken link. The user will get a 404 (Not Found) page from that broken link - not a great user experience, and your site will also lose the SEO value of back-links if they return 404s. Umbraco protects you by automatically creating a 301 redirect to the newly named page. A 301 redirect is a server response to a browser page request that tells the browser that page has been permanently moved to a new location, the URL to the new location is sent back with the 301 response. The same goes for moving a page in the site tree. If you move a page in the site tree, you are changing its path in your site, and thus breaking the link.
Umbraco has a handy list of all the 301 redirects that it manages, the list can be seen on a tab in the Umbraco BackOffice in the root of the content tree. To view the redirects tab in the Umbraco BackOffice, select the content root to display the “Get Started” and “Redirect URL Management” tabs. The Redirect URL Management tab displays the redirect that have been added and a button to disable the automatic addition of redirects.
These redirects are stored in the Umbraco database table 'umbracoRedirectUrl'. This table has 5 columns, they are:
This is the ‘key’ for the data row, any newly generated guid can be used here.
ContentKey is the UniqueID of the Umbraco content item, the umbracoNode table contains all of the Umbraco content items (nodes) and stores this value as the Unique Id.
The UTC create date of the data item. A SQL insert statement with a call to GETUTCDATE(), or a C# Datetime.UtcNow().
This is the original Url of the item. The Url that is out in the wild, that the internet is using to get to your page.
UrlHash is an SHA1 encoded hash value of the original (old) URL.
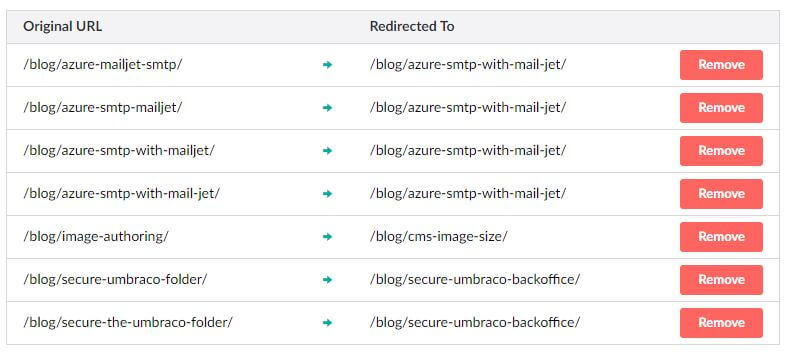
The following is a snippet of the umbracoRedirectUrl table for the redirects in my site currently.

The entries in this table are what the Umbraco BackOffice displays on the "Redirect URL Management" tab.
So, direct manipulation of this table with a simple INSERT statement can be used to create 301 redirects.
Here is an example SQL Insert I concocted that creates a redirect for the URL "/blog/a-link-that-was-changed".
INSERT INTO umbracoRedirectUrl
  (id,
  contentKey,
  createDateUtc,
  url,
  urlHash)
VALUES
  (NEWID(),
  '7E61E91E-05C4-45B1-B573-9EF6DE93A13B',
  GETUTCDATE(),
  '/blog/a-link-that-was-changed',
  sys.fn_varbintohexsubstring(0, HashBytes('SHA1', '/blog/a-link-that-was-changed'), 1, 0));
The HashBytes function provides the SHA1 encoding, and the SQL function fn_varbintohexsubstring converts binary data to a string so we can store the hash value in a varchar field. After running this INSERT on my database, inspection of the umbracoRedirectUrl table reveals the new entry, as does the redirect tab in the Umbraco BackOffice.
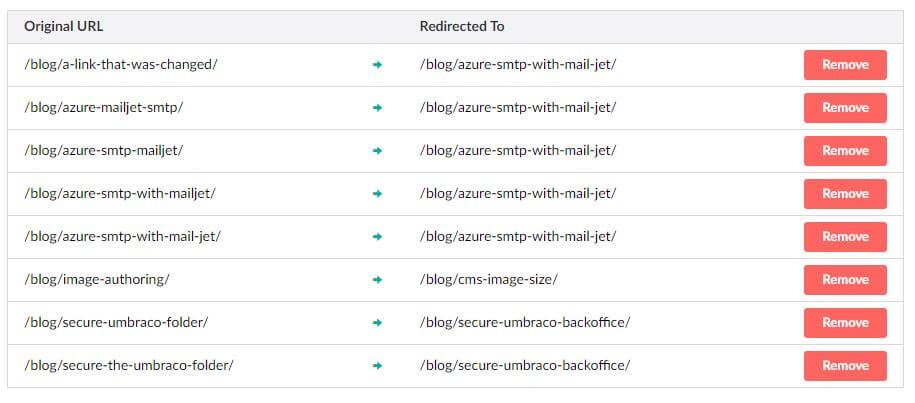
The new redirect can be tested by clicking the original URL. The redirect page should be displayed.
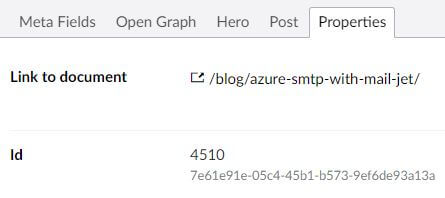
The contentKey value represents the Umbraco content item to which you are forwarding, so how do you get this value? If you navigate to your pages in the Umbraco BackOffice and view the item properties, both the Node Id and the Content Key are displayed. The Content Key is stored as the UniqueId in the umbracoNode table along with the NodeId.
Hashing the original Url creates a smaller 'key' value that can be indexed by the database and thus speed up URL lookups. Any service that provides the SHA1 hash algorithm can be used. The Umbraco core library provides a string extension method "ToSHA1()" that can be called if you wish to write some C# to create entries in the umbracoRedirectURL table.
Another option to setup redirects is by using HTTP redirection. This might be useful if you have a handful of permanent redirects to add and don't have access to the Umbraco database.
If you have the HTTPRedirection feature enabled on IIS, you can add redirects as location elements to the web.config. Here is an example entry:
<location path="blog/original-path-to-page">
  <system.webServer>
    <httpRedirect enabled="true" destination="http://localhost:57475/blog/azure-smtp-with-mail-jet" httpResponseStatus="Permanent" />
  </system.webServer>
</location>
This approach works well for a handful of redirects, maybe 20-50 before the web.config starts to get unwieldy. The location element cannot be extracted to an external config as far as I know, so because these entries will clutter up the web.config, I recommend keeping them to a minimum.
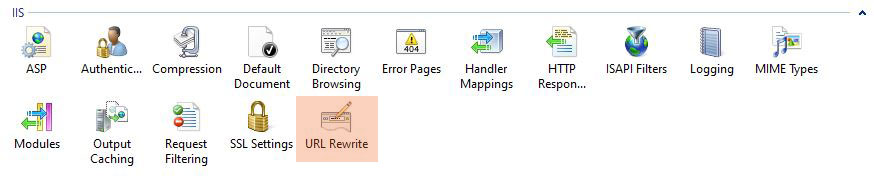
Another approach for 301 redirects is to use IIS URL rewrites. In order to enable 301 redirects you need to install the IIS rewrite module. URL Rewrites can be stored in a separate config file, and the entries are concise making this a great approach for managing a large number of redirects.
Create a new config file in the same directory as the web.config. It can have any name, I called my rewrite.config. The rewrite.config file should not include the <configuration> section or the XML prolog, just the rewriteMaps element. The contents of this file will be injected into the web.config so additional XML elements will break it. Here is my example of my rewrite.config file
<rewriteMaps>
  <rewriteMap name="Redirects">
    <add key="/blog/published-path-to-page" value="/blog/azure-smtp-with-mail-jet" />
  </rewriteMap>
</rewriteMaps>Now that we have a rewrite config file, it needs to be included in the web.config. Add the following to the web.config to include it and add a rule handle the redirect behaviour.
<system.webServer>
  <rewrite>
    <rewriteMaps configSource="Rewrite.config"/>
      <rules>
        <rule name="Redirect rule1 for Redirects">
        <match url=".*" />
        <conditions>
        <add input="{Redirects:{REQUEST_URI}}" pattern="(.+)" />
        </conditions>
        <action type="Redirect" url="{C:1}" appendQueryString="false" />
      </rule>
    </rules>
  </rewrite>
</system.webServer>Once the redirects config and web.config are deployed to IIS, you can view redirect setup by opening the URLRedirect module in IIS.
The Rule is displayed in the Url Rewrite list, as follows:
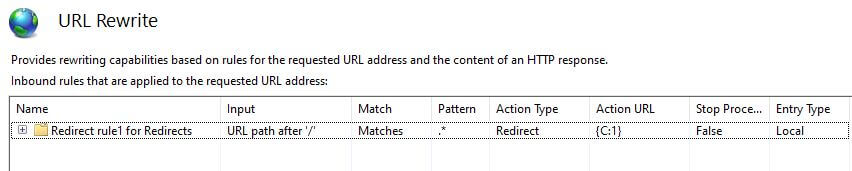
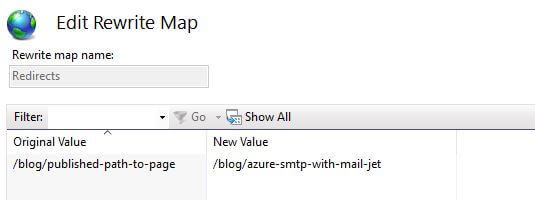
From this panel click the "View Rewrite Maps" link in the right hand side panel to display the redirect maps. The single entry I added to my rewrite file example can be seen listed.
Being able to edit and display redirect mappings in a single isolated config file allows for easy management of a high volume of redirects. It is fairly trivial to read a csv mapping file into a rewrite config file. IIS handled 301 redirects are also optimal as the Umbraco server process does not need to be involved in the redirection handling. Umbraco involvement in 301 redirects requires database look-ups which is slower than IIS handled requests. URL rewrites are a great approach for a large number of redirects, where you have 100 or more. In a follow up I plan to compare actual performance of redirect approaches under a comparative load test to get a more conclusive number of redirects to make the decision to use IIS URL Rewrites.
In Sum, the built in Umbraco redirect handler is great to deal with day to day renaming and path changes to current content. Adding entries to the umbracoRedirectUrl table with SQL works for single case scenarios where more direct control is needed, such as the creation of vanity URLs.
For cases with a large number of redirects, like a site migration, the IIS URL Rewrite module and separated config mappings file is the optimal approach. A full site migration will typically create a large number of necessary redirect mappings which are only needed to handle legacy links. These redirects are best kept out of Umbraco because the site should be serving content, not handling administrative tasks.
All examples in this post were run on Umbraco version 7.7.2.
For additional Umbraco information check these other posts: