
A secure Umbraco backoffice is essential to reducing the attack surface of your site. The Umbraco folder in a site is the content authoring and administration entry point to your site, it represents a huge potential vulnerability. Serving your Umbraco site with HTTPS is critical to securing the login, but HTTPS alone isn't enough to keep the CMS secure.
Digital security is all about reducing the attack surface, the open technology landscape of your web site including the infrastructure, OS, network and application. Restricting the Umbraco admin portal to only allow specific IP addresses help reduce this attack surface.
Obscuring the technology that is behind your site also helps protect it because knowing the technology provides insight into the vulnerabilities of the site.
You'll need the IP address or address range (or ranges) that you want to restrict. For this example I'm using the VM that hosts this site. It's a Windows Server 2019 Azure VM with Umbraco 7.7.1. But this setup works with older versions of Server and IIS. The formal documentation is here IIS IP Security
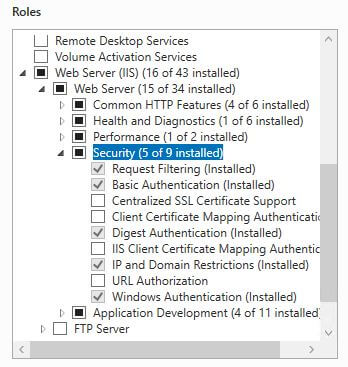
IP Security is not installed in IIS by default, to add it open Server Manager. Select "Manage" in the top right corner and select "Add Roles and Features". The Installation Type is "Role-based of feature-based installation". Select the server onto which to install this feature.
Under "Server Roles" add the IP and Domain Restrictions feature into IIS. It is under Web Server (IIS)->Web Server->Security.

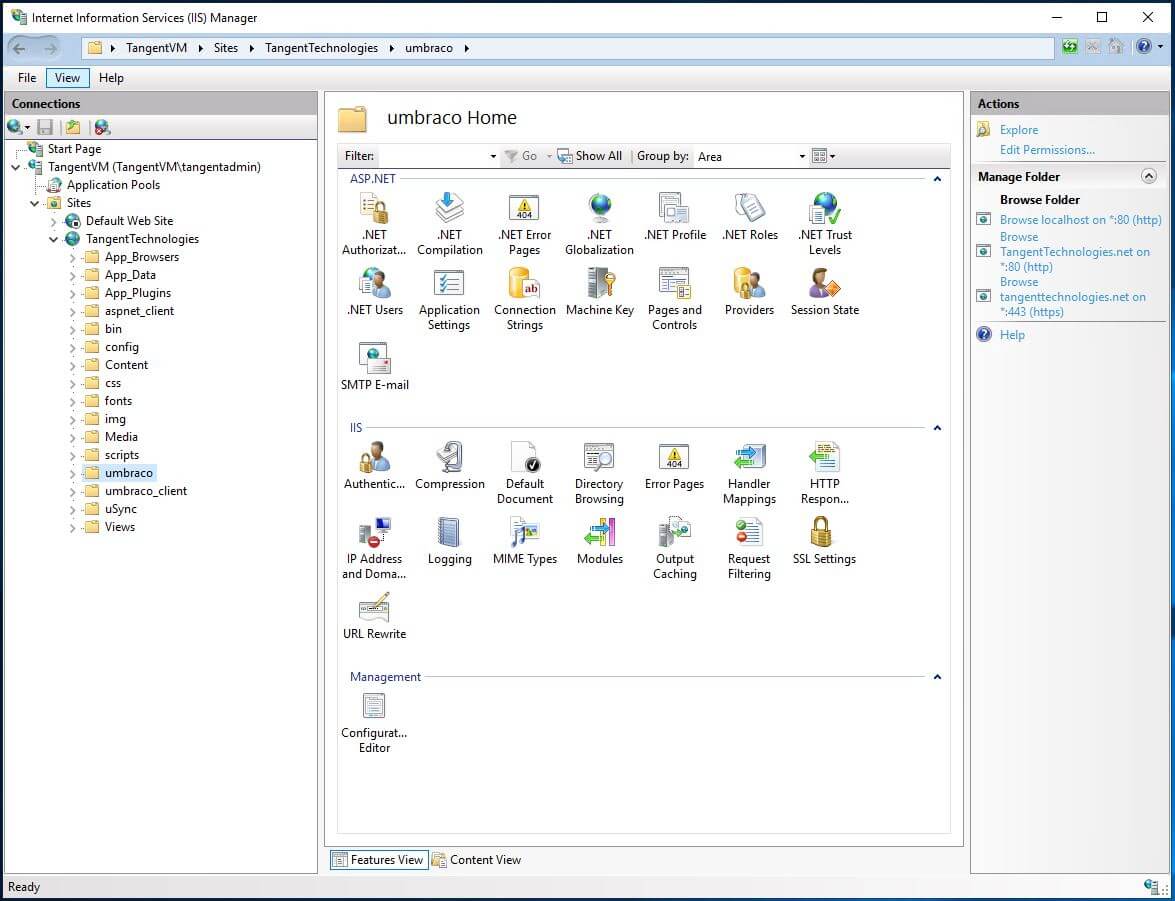
The easiest way to add IP restrictions is through the IIS front end. Open IIS and navigate to the "umbraco" folder in your site.

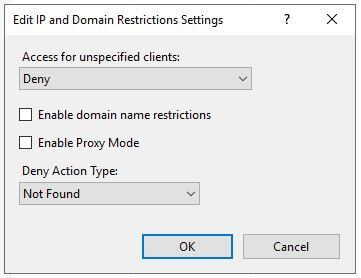
With the "umbraco" folder selected, open the IP Address and Domain Restrictions applet. By default the IP restrictions are set to allow all. If you add IP address with the default configuration, IIS will assume that you want to block those IP addresses. This isn't what we want. To reverse this behaviour, select "Edit Feature Settings...". Change the "Access for unspecified clients" to "Deny" and set the "Deny Action Type". I have chosen a 404 response so that I obscure the technology stack I have implemented. Anyone that attempts to access the umbraco page without being white-listed will receive a 404.

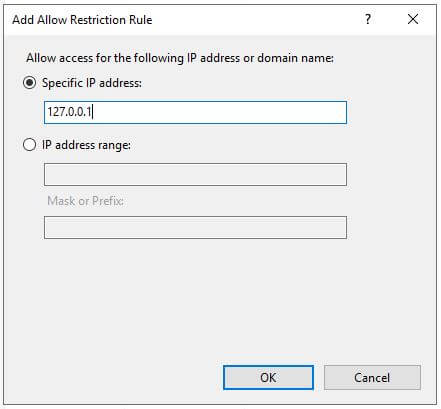
You are now setup to start white-listing IP addresses. In my case, I have added the loopback address so that I can test the secure Umbraco backoffice setup from the server. I have also added my office IP address which allows me to access the backoffice locally. A range can be specified by including a sub-net mask. CIDR format does not seem to be available yet.

All of these settings can be specified in the web.config in case you are running a Umbraco in an Azure App Service. Check the Microsoft documentation for these settings.
If you are using the Umbraco API you will want to lock down Umbraco using URL rewrites. Please refer to the Umbraco Security Hardening Guide for this strategy. As long as you permit the loopback address, your Surface controllers should be accessible by the web server so internal requests will be allowed. But if you are accessing these end points from an external IP address you will be blocked.
IIS IP Whitelisting can be used to provide a secure Umbraco Backoffice, It has some limitations with endpoints that don't exist as folders, but exist as logical end points exposed by controllers. Protecting the Umbraco folder can also be achieved with URL Rewrites, and there is a lot more required to harden an Umbraco install. Hiding the technology implementation of a web site is a strong step towards reducing the attach surface.
Photo by Jason Blackeye on Unsplash